|
Welcome

 Simone, 25 Simone, 25 Welcome to my blog! I wanted to do something a little different from posting on Facebook. Instead, I'll post about my life, fashion inspirations, and beauty secrets on my blog. I hope you enjoy your stay and feel free to follow!
 Labels
Beauty Budget Bride Gifts Haul Holiday Home Journal OOTD Organization Personal Planner ReviewInstagram
twitter
likes
Banners
   Disclaimer
Photos without credit are mine.All other photos I post were found from Tumblr. I will always post a click through link to the credit. If the credit is incorrect or if I am using your photo, please let me know ASAP so I can credit it properly. |
Alooooooha! I am currently writing this in Maui! I hope all is well with you. I want to apologize in advance because my photo editing software is at home but I thought I would use my cute photo decorating apps so I can upload as soon as possible. I thought while I’m here, I would do a review on the My Scheming’s Rose Dew Moisturizing Mask that I used after our day of flying. Six hours on a plane can really dry your skin out! Let’s get started~  About the product: 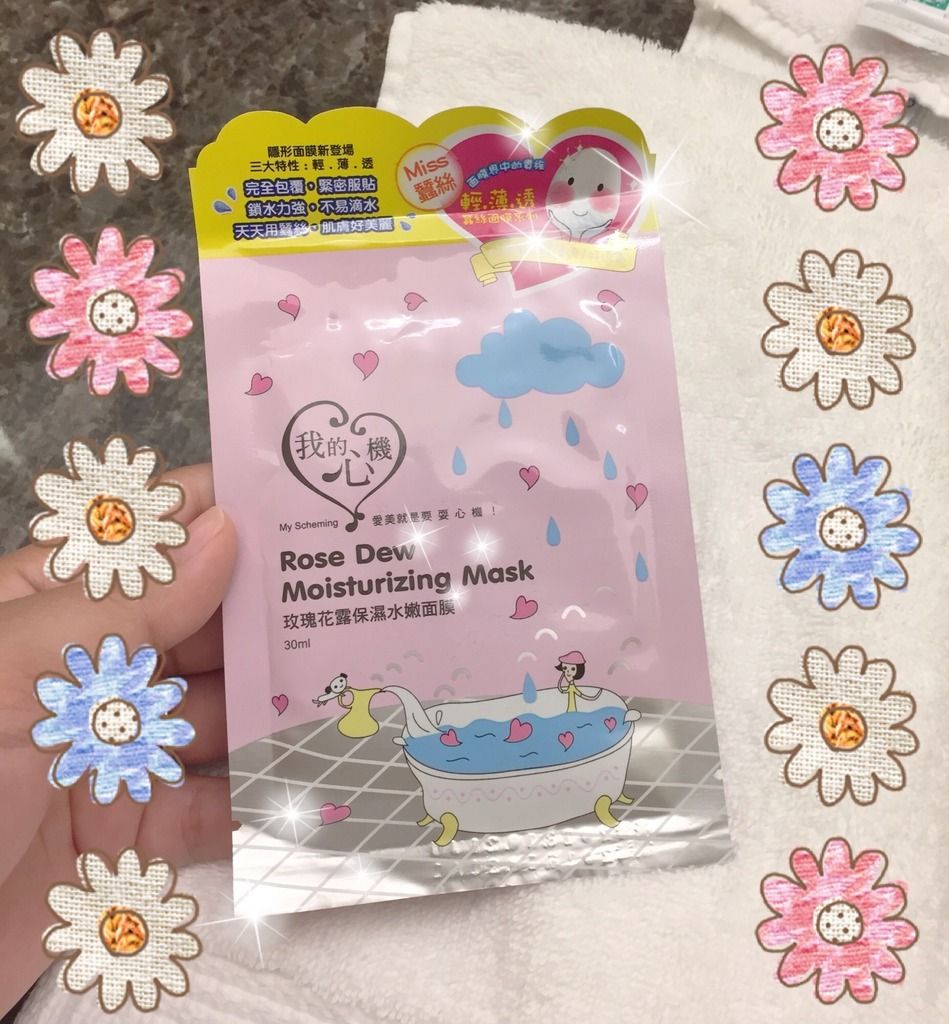 How to use this product: 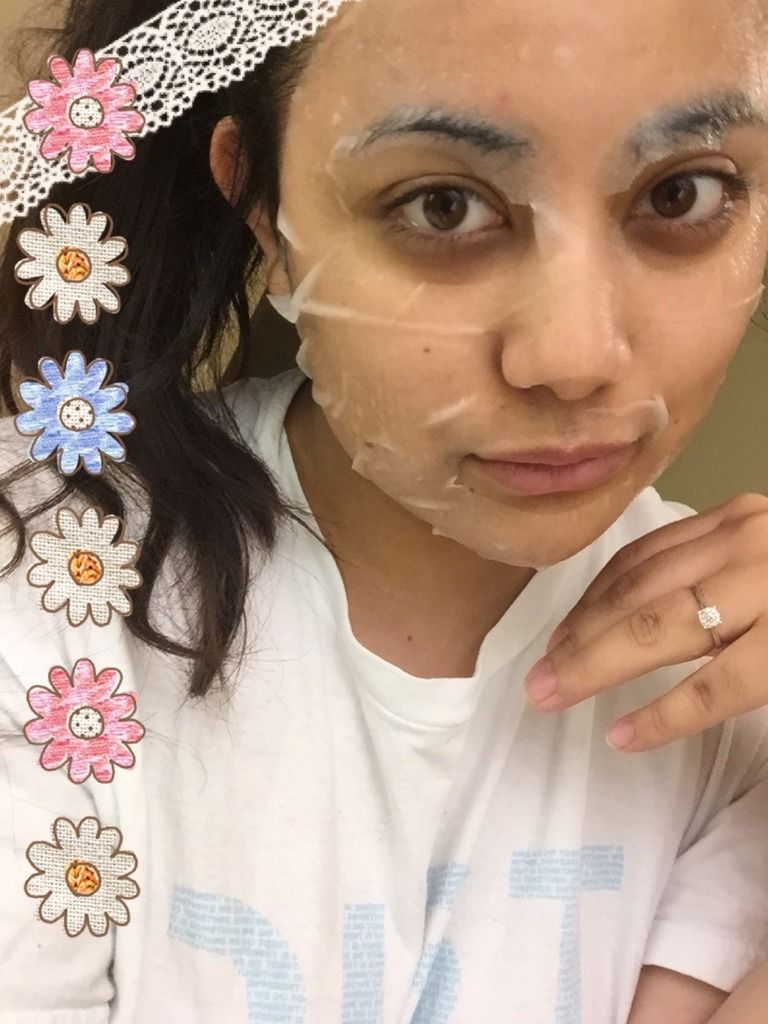  I left the mask on for 20 minutes. It is recommended you use this mask for about 15-20 minutes. The silk will be VERY slimy/slippery so you might want to readjust half way through your allotted time. After the time was up, I tapped the mask to ensure the moisture would transfer to my skin. Next, slowly peel the silk away from your face. It leaves a lot of moisture on your face. At this point, you can either rinse your face or leave the moisture for extra hydration. To enjoy the full effects of the mask, I left the moisture on my skin. The results:  IMAGE NOT EDITED OTHER THAN FLOWER DECO I’M IN LOVE! This product is so hydrating and I can feel my skin singing praise. My skin feels clean, silky, and hydrated. Plus, leaving the moisture on my face allowed my skin to continue absorbing the much needed hydration. Another positive is the moisture didn’t leave my face feeling sticky. It feels a little slimy but as the moisture dries, you can feel the sliminess go away. The mask also didn’t irritate my eyes or my skin! I know I will definitely try this mask again. I would recommend doing this mask after any day of travel, a day in the sun when you might not be hydrated, or even in the winter time when your skin is especially dry. Rating:
Buy it HERE. 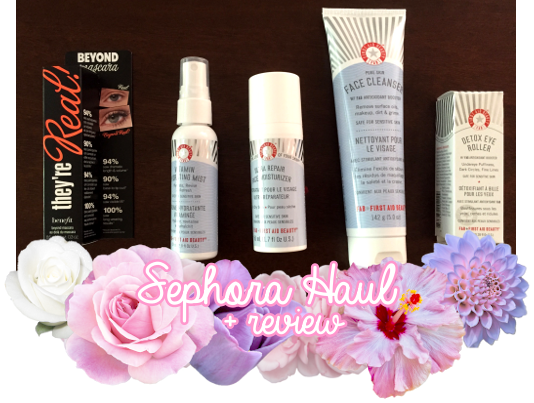 It’s very rare for me to use up my makeup and face products at the same time but it recently happened. The result? A small Sephora haul to replenish plus some new items that I purchased to test out. Mascara: They’re Real by Benefit. Since I don’t get lash extensions anymore I needed a mascara that makes my lashes look thick and long. I’ve tried so many mascaras, from high end to drug store, and They’re Real works the best for me. I think the brush is the secret. It evenly coats my lashes while the build-able formula does its part and aids in creating the look you want. Sephora also has the smaller size that I would recommend buying if it’s your first time purchasing the product. Please note that my lashes are naturally fairly long and thick so my results may be different than others. Vitamin Hydrating Mist by First Aid Beauty (FAB). This is actually a new product for me. I used to purchase the Evian mist to keep my face hydrated but when I saw this product from FAB I wanted to check it out. I have very dry and sensitive skin including psoriasis on my eyelids. FAB products keep my psoriasis and dry skin under control so I thought this mist would be worth a try.It has a scent to it that I don’t particularly like but friends like it and describe it as “refreshing”. The mist helps cool your face as well as provides moisture. As marketed, the mist is enriched with vitamins. There’s vitamin B5 to reduce the appearance of redness, vitamin E to nurture and hydrate your skin, and vitamin C to help brighten. There’s also an antioxidant booster to help fight against free radicals. I haven’t noticed much of the brightening but I did notice that it helped moisturize my face during the day. Would I buy it again? I’m not sure. Right now, it’s hard for me to say since I haven’t been using it for too long. Ultra Repair Face Moisturizer by FAB. I LOVE THIS PRODUCT! This is my go to moisturizer and I’ve been using it for 2 years. It keeps my psoriasis under control and penetrates the skin to provide the moisture my face needs. I use this after washing my face (morning and night) and before I apply makeup. If my psoriasis flares up, I apply a little extra and pair it with the thicker ultra repair cream. Honestly, it hasn’t flared up since using this product unless I stop using it for an extended amount of time (mainly when I’m on vacation).It leaves your skin feeling silky, soft, and clean. There’s no gross film that some lotions or moisturizers may leave. It’s very light weight which allows your skin to freely breathe. I honestly don’t think I would ever go to another moisturizer after using this. Face Cleanser by FAB. This is the face wash I have been using for a while now. I originally bought it to use in tandem with my face moisturizer but just stuck with it since it works so well. It removes dirt, makeup, and daily grime leaving your skin feeling soft and fresh. Part of why I stick to this cleanser is because it’s gentle on my skin. It doesn’t clog pores and when I do get a blemish here or there, it helps keep the area clean. I would recommend this product to those who have dry or sensitive skin. Detox Eye Roller by FAB. Another new product that I have actually fallen in love with. It is meant to alleviate under eye puffiness and dark circles and I found that it’s been working! I’ve been using this product morning and night after I cleanse my face and before I moisturize it. It does tingle and honestly, it kind of stings, but the cool metal feels nice on the face. After regular use, I’ve noticed my dark circles aren’t nearly as bad and my eyes aren’t puffy when I wake up. I feel like it makes my eyes look more youthful and once the tingling is gone, my eye area feels very refreshed. Even though it’s early, I would repurchase this little eye roller.Although this isn’t my full skin care regimen, I use the majority of these items daily. I can post a skin care post at a later date but I hope this little haul and review was helpful! (Especially for those who have sensitive and dry skin.) Stay freeessshhh~! 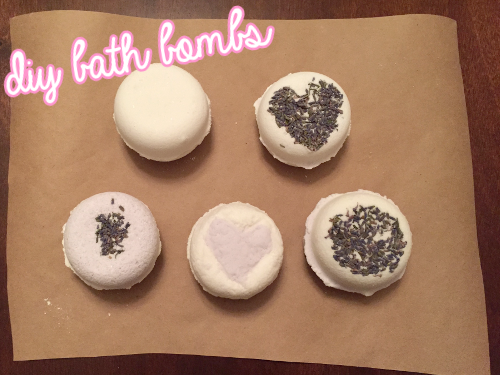 Hi loves! Sorry for the delay. Life has been so busy lately. We’ve been super busy with church functions and I recently applied to be an assistant dance team coach! Fingers are crossed that I get the position. In any case, I thought I’d bring a fun little DIY. Here is how to make bath bombs! 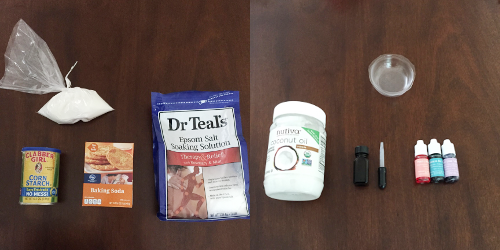 What you need: 1 cup Baking Soda ½ cup Epsom Salt ½ cup Citric Acid (or cream of tartar) ½ cup Corn Starch 2 tsbp lavender essence (or any scent of your choice) 2½ tbsp. coconut oil Food color or soap dyes of your choice Gloves 2 bowls – 1 dry ingredient bowl, 1 wet ingredient bowl Bath bomb mold – I used a soap mold Spray bottleOptional: Additional bowls for multiple colors Dried flowers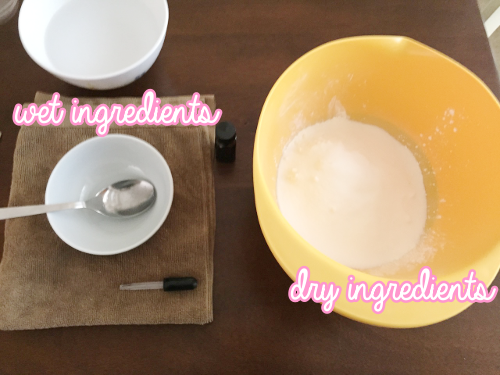 Step 1: Start by combining dry ingredients in one bowl. Make sure everything is completely mixed. Step 2: Combine essence and coconut oil. Your coconut oil might need to be melted so I suggest taking a hot bowl of water and putting a smaller bowl inside it. It will act as a double boiler. Coconut oil melts at 76 °F (24 °C ) so just stir your oil for a bit and it will become liquid fairly quickly. Be sure not to splash any water inside your oil bowl. Step 3: Very SLOWLY add wet ingredients with your dry ingredients. (NOTE: The reason why you want to add your wet ingredients slowly is so the dry ingredients don’t start the chemical reaction! This will render your bath bomb useless.) Be sure to stir constantly! I’ve seen people whisk ingredients but I find it easier to knead the dry ingredients together while spooning in the wet ingredients. Continue mixing until completely mixed. If you want white bombs, start step 4.  Step 3a: For colored bombs, separate your mixture into as many bowls as needed (one bowl per color). In my demonstration I only used lavender as an additional color. Continue kneading your mixture and start dropping in your color. The amount of color will vary depending on what shade you’re looking for and what product you use. Keep in mind that this is a wet ingredient and you want to use a little at a time. Using too much all at once will cause the mixture to react! 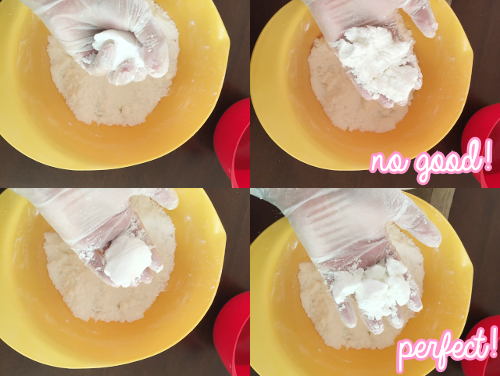 Step 4: You are looking for the consistency of wet sand. This means when you squeeze the mixture, it will form a shape. If your mixture doesn’t hold when you squeeze it together, you need more water. Use a spray bottle with water and spray the mixture. Do this a little at a time! You don’t want your mixture to get too damp. Your mixture should be able to crumble if you apply pressure to it. 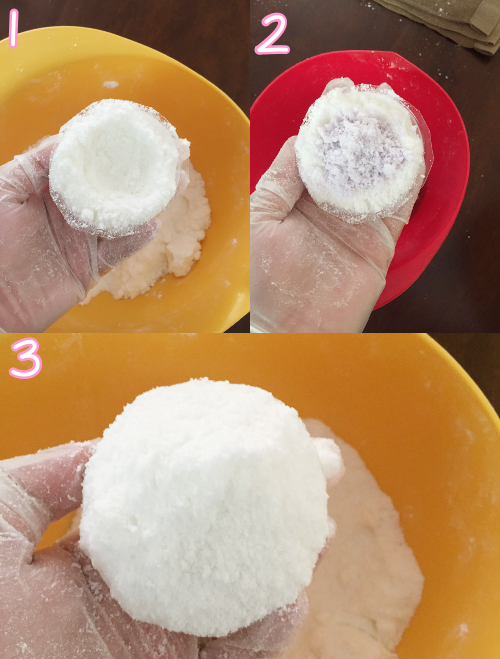 Step 5: Start filling your molds! In my examples you can fill one mold, create a hole for a different color, then fill the top with your starting color. You will do this for both molds. (NOTE: You need to over fill your mold so that the mixture will stick together easier.) Other ways you can make your bath bombs is by filling one side with one color and the other with another. You can even fill the middle with flowers, create flower designs on the bottom of the molds or even colored designs. It’s completely up to you! Have fun and be creative here.  Step 6: Press molds together. It’ll take a while to firmly get them to close but once you close it, the mixture should be compacted enough that it will have a nice hold.  Step 7: Slowly remove the mold. If it’s not ready, you will see it crack. Do not force it out. Press the molds together again. Tap the outsides of the mold and try again. This time it should come out nice and neat. Step 8: Let your bath bomb dry at least 24 hours before handling further. For best results, when I waited 48 hours they were hard as rocks. Waiting longer also helped the bomb float instead of sinking to the bottom of the bath. Storage: I keep mine in cling-wrap. It’ll help keep water out and they stay fresh. You can then display them or keep them in a handy place for when you want to enjoy a luxurious bath. I hope you enjoy and have fun making these bad boys! There’s nothing more satisfying than jumping into the bath to relax and knowing you made some really cool bath bombs. Enjoy! 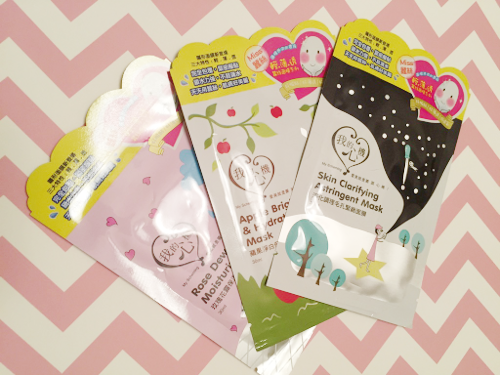 At our Asian specialty store, Uwajimaya, they had a whole shelf of face masks. I decided to go with these three to start: The Rose Dew Moisturizing Mask for days that my skin needs extra moisture. The Apple Brightening and Hydrating Mask for days where my skin needs a picker upper. The Skin Clarifying Astringent Mask for days where my skin is “breaking out” or just not looking it’s best.Mind you, I didn’t read the backs of any of these and just went with the name of the mask. There were literally so many to choose from! At only $2.00 a piece, it’s quite a steal. I’ll most likely go back and try other options. Let’s start with the Skin Clarifying Astringent Mask. About the product: 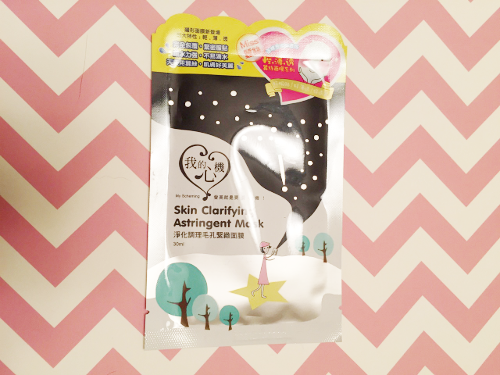 This Taiwan brand describes this mask to help purify pores, balance oil secretion, condition skin, and help bring back hydration and nourishment to the skin. On top of that, the hyaluronic acid should make your skin feel silky, smooth, and clean! How to use this product: 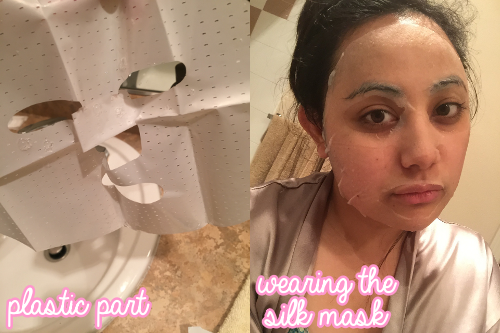 After cleansing, place the “silk” side of the mask on your face. There is a plastic piece that allows you to unfold and apply the mask easier. One you placed the mask on your face, you can peel away the plastic and smooth out any air bubbles in the silk mask. I found that this mask fit well but because it was so wet, I found it sliding down my face. It might be useful to stay in one place and not trying to do housework while wearing the mask. I left the mask on for 20 minutes. It is recommended between 15-20. After time was up, I tapped the mask to make sure the moisture would transfer to my skin. Next, peel the silk from your face. It’ll leave a lot of the moisture on your face. At this point, you can either rinse your face or leave the moisture on your face. I left it on to experience the full effects of the mask. The results: 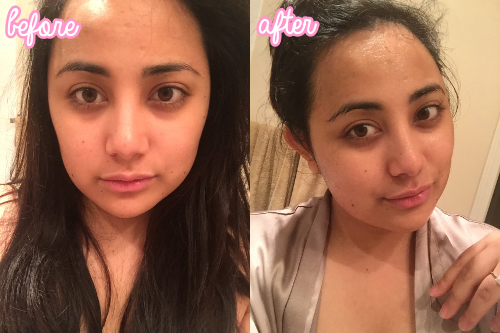 IMAGE NOT EDITED SO YOU CAN SEE THE SLIGHT DIFFERENCES I found that the moisture left my face feeling sticky and not as clean or silky as it claimed. However, I feel like my skin looked smoother, hydrated, and in slightly better condition. One of the nicest things I found with this mask is how it didn't irritate my eyes. Most face masks that are similar hurt my eyes but this one had very minimal irritation. So will I try it again? Yes. I think maybe with multiple applications, you’ll see more results. However, I feel like doing this before going out or at the beginning of the day would be best because you certainly will feel refreshed. I would also recommend rinsing your face to feel cleaner skin. Rating:
Buy it HERE. |