|
Welcome

 Simone, 25 Simone, 25 Welcome to my blog! I wanted to do something a little different from posting on Facebook. Instead, I'll post about my life, fashion inspirations, and beauty secrets on my blog. I hope you enjoy your stay and feel free to follow!
 Labels
Beauty Budget Bride Gifts Haul Holiday Home Journal OOTD Organization Personal Planner ReviewInstagram
twitter
likes
Banners
   Disclaimer
Photos without credit are mine.All other photos I post were found from Tumblr. I will always post a click through link to the credit. If the credit is incorrect or if I am using your photo, please let me know ASAP so I can credit it properly. |
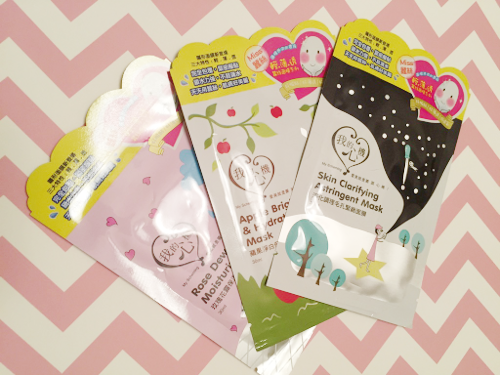 At our Asian specialty store, Uwajimaya, they had a whole shelf of face masks. I decided to go with these three to start: The Rose Dew Moisturizing Mask for days that my skin needs extra moisture. The Apple Brightening and Hydrating Mask for days where my skin needs a picker upper. The Skin Clarifying Astringent Mask for days where my skin is “breaking out” or just not looking it’s best.Mind you, I didn’t read the backs of any of these and just went with the name of the mask. There were literally so many to choose from! At only $2.00 a piece, it’s quite a steal. I’ll most likely go back and try other options. Let’s start with the Skin Clarifying Astringent Mask.  About the product: 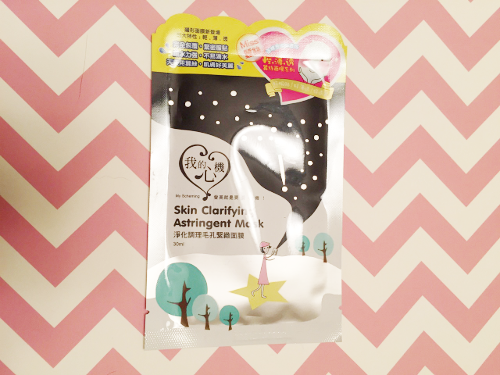 This Taiwan brand describes this mask to help purify pores, balance oil secretion, condition skin, and help bring back hydration and nourishment to the skin. On top of that, the hyaluronic acid should make your skin feel silky, smooth, and clean! How to use this product: 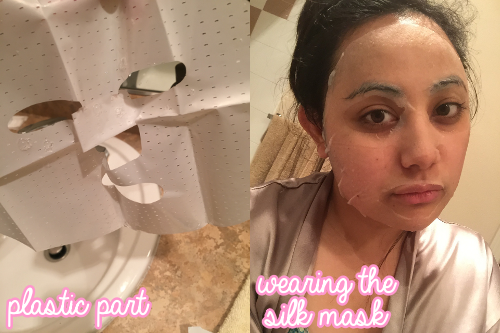 After cleansing, place the “silk” side of the mask on your face. There is a plastic piece that allows you to unfold and apply the mask easier. One you placed the mask on your face, you can peel away the plastic and smooth out any air bubbles in the silk mask. I found that this mask fit well but because it was so wet, I found it sliding down my face. It might be useful to stay in one place and not trying to do housework while wearing the mask. I left the mask on for 20 minutes. It is recommended between 15-20. After time was up, I tapped the mask to make sure the moisture would transfer to my skin. Next, peel the silk from your face. It’ll leave a lot of the moisture on your face. At this point, you can either rinse your face or leave the moisture on your face. I left it on to experience the full effects of the mask. The results: 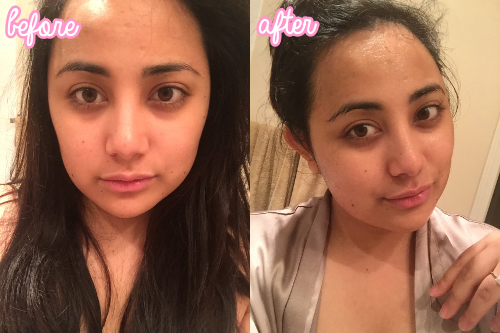 IMAGE NOT EDITED SO YOU CAN SEE THE SLIGHT DIFFERENCES I found that the moisture left my face feeling sticky and not as clean or silky as it claimed. However, I feel like my skin looked smoother, hydrated, and in slightly better condition. One of the nicest things I found with this mask is how it didn't irritate my eyes. Most face masks that are similar hurt my eyes but this one had very minimal irritation. So will I try it again? Yes. I think maybe with multiple applications, you’ll see more results. However, I feel like doing this before going out or at the beginning of the day would be best because you certainly will feel refreshed. I would also recommend rinsing your face to feel cleaner skin. Rating:
Buy it HERE.
So this will be a super short post. I recently started a journal that’s home to inspiring bible verses, motivating quotes, and happy memories. I have no clue what to call it but I’ve just been calling it my inspiration journal. In any case, since I started my journal, I needed new supplies. I already had some but recently I went to the Target’s Dollar Spot and found some super cute supplies. I believe this is still part of the March 2015 supplies.
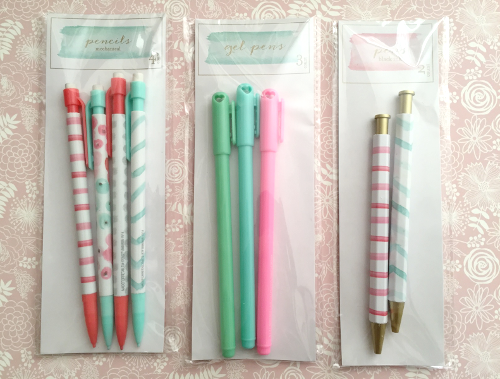 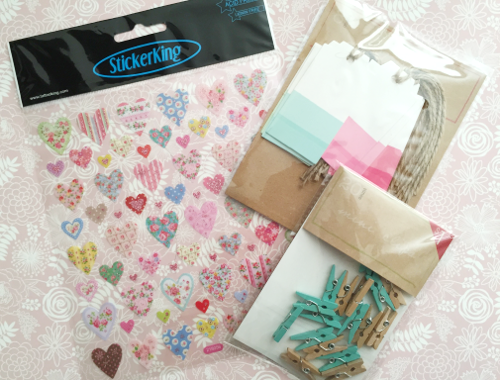 I found mechanical pencils, gel pens, and regular pens. I also found some clothes pins and tags. The stickers I found were from Fred Meyer for $1! I’ll probably use the clothes pins to pin items I don’t want to glue or tape down. As for the tags, I thought would be great as either bookmarks or maybe even date tags. If I end up not using them I’ll most likely use them as gift tags or tags for Pastel Romance. I was thinking I might do a giveaway but I’m not sure if anyone is interested. Please let me know if you think I should go ahead and do some sort of giveaway!
Hey guys! I'm so sorry for the delay! I've been super busy with planning my wilderness camping trip and spending time with family that I just didn't have time to code and finish editing my photos for this post! However, as promised earlier this week, here is how I clean out my closet.
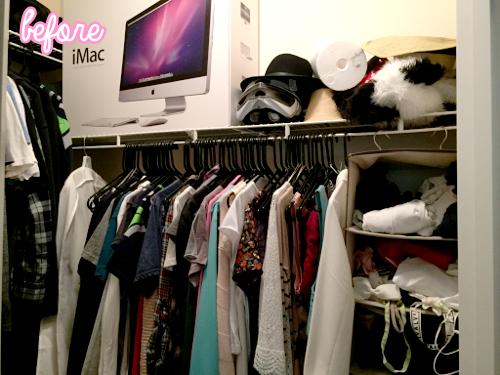 So our bedroom closet is our largest closet. We seriously don’t have that much space in our apartment so we have to try and store most of our things in here. We have our linen closet and a small hallway closet that keeps our jackets, ironing board, weights, and vacuum cleaner. So in the bedroom closet we have our luggage, clothes, some shoes, my bags, and additional things that were in boxes. To start, I emptied out my side and some of Jered’s side. Seriously, emptying out the closet as much as possible will make it easier for you. If you have your own closet, empty the whole thing out. You need to see what you’re working with. 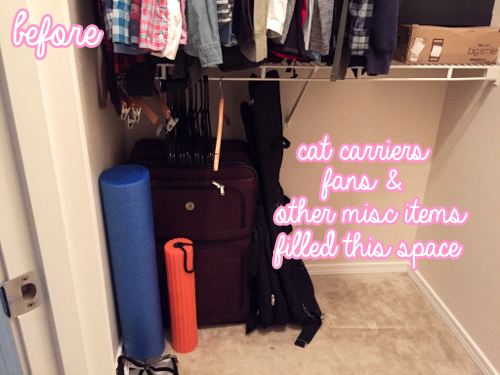 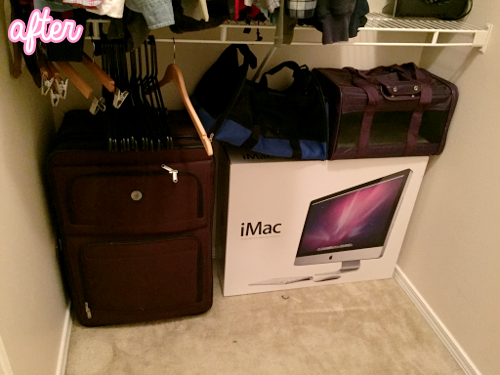 I ended up emptying his side further and moved some items to places that made more sense. I moved the foam rollers to under Jered’s side of the bed. He usually does those when his back is really irritating him. Since that’s not used as often as before, it made more sense to put it under the bed. I also moved his guitar cases into the smaller hallway closet. I left the large suitcase where it was but moved the large iMac box next to it. I also stacked our cat carriers on top of the box. NOTE: Because we have plans on selling his iMac, that box will be leaving in the near future. 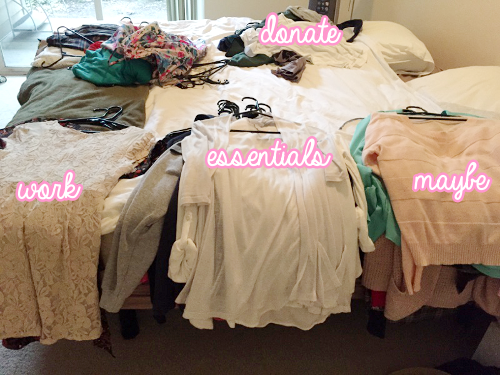 After taking care of Jered’s side, I thought I would tackle my side. To clean out my closet, I divide my clothes into 4 piles: An essentials pile – items I reach for first and timeless pieces. A work pile – items that I need for work but might not wear on a regular basis. A maybe pile – items that don’t fall into the other two categories but I might want to keep the item. A giveaway/donation pile – items I know I don’t need anymore.Once everything has been divided, it’s time to start further eliminating old clothing. I always start with my essentials pile as it should make up the majority of your wardrobe (unless you’re rich and can afford to change out your clothes every season). I mainly stick to a black, white, and grey color pallet and this honestly makes my essentials pile so much easier to maintain. In this pile, I have a few t-shirts, collared shirts including button ups, pull over sweaters, cardigans, and dresses. Anything that is too worn (think pilling or holes) or doesn’t fit properly, get rid of it. Otherwise, usually your essentials pile is good to go. The work pile is fairly self-explanatory. Its clothes that you need to wear for work. Depending on your job, this can really vary. If you work in a corporate position, then things like button ups, dresses, and cardigans are essential to obtaining that professional look. If this is the case, I would recommend getting rid of things that don’t fit properly or are old and worn. The maybe pile can be a little tricky. You’ll want to get rid of items that are tired and stuff you’re just not feeling anymore. If you’re having a hard time thinking if you should keep or donate it, ask yourself: When’s the last time I wore this? When’s the next time I want to wear this? Do I want to wear it? A general rule of thumb for me is if I haven’t worn it within the last 6 months, I probably won’t wear it anytime soon so it’s time to let it go. 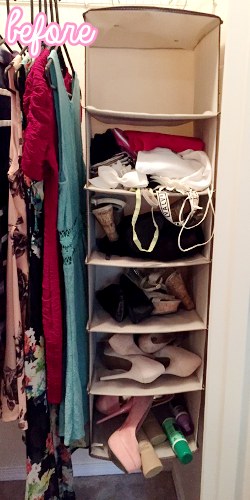 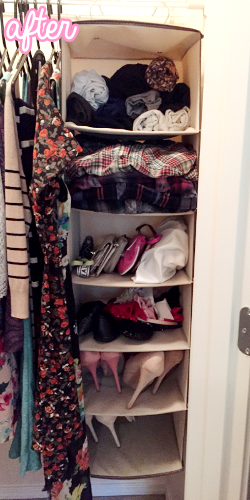 I originally bought this shoe holder to hold shoes. It eventually started to hold some tank tops (not pictured) and miscellaneous items along with shoes. I ended up getting rid of all the tank tops I don’t wear anymore. However, I still have a good amount of tank tops that I keep rolled up. In the second cubby, I originally had my miscellaneous items which included wallets/clutches and hair accessories. Instead, I folded my flannels and put them there. This made my hanging clothes more visually appealing. I put my wallets and clutches in the third cubby and my hair accessories in the fourth cubby. The last two cubbies have my heels that I don’t wear as often (they are seasonal items). 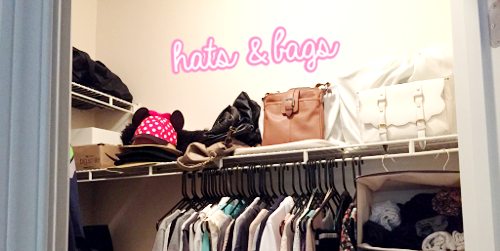 One reason why I really wanted to make space in the closet is for my bags. They were originally sitting out in the open by my bedside table. Not a pretty sight. I ended up putting them on the top rack. I still haven’t decided if I would like to keep them there or not. Along with the purses, I put my hats on the top rack. I ended up stacking them on top of each other and luckily they fit nicely. 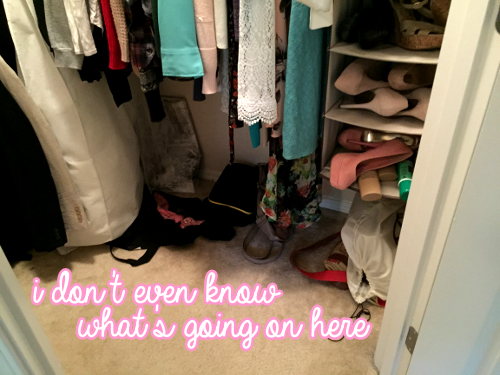 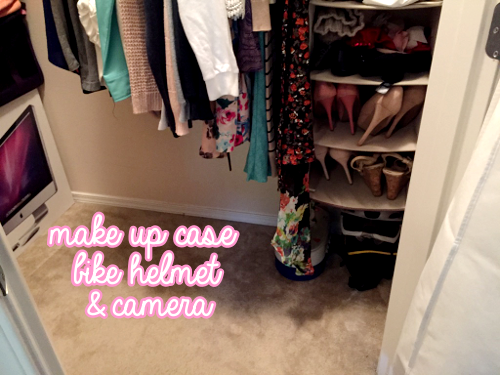 Last but not least, here's a few shots of what the floor looks like. I kept my large makeup case, bike helmet, and camera on the floor. This was for easy access purposes. But other than that, it's much more organized and cleared as a floor should be. 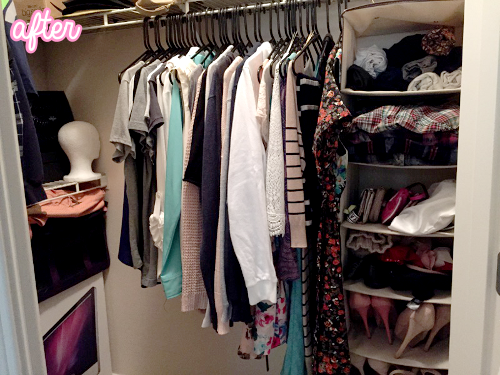 And here's the final "after" look. It's still not as organized or clean as I would like but it's a start. I think eventually I'll have to get Jered to organize his things. Again, we'll most likely be down sizing even more depending on where we plan on moving. By the way, I moved that creepy wig head to be behind the fan :P NOTE: In my before photos I do have my wedding dress. I finally sent it off to get preserved. One I get it back I'll decide if I would like to sell it or keep it. I left this out as not that many people just have a wedding dress hanging around. Labels: home, organization
Hey guys, Unfortunately, I won't be posting about the closet clean out this week. Life got in the way and I didn't have time to finish editing my photos/coding everything to get the post ready by this week. Be sure to look out for it next week! I'm sorry!! 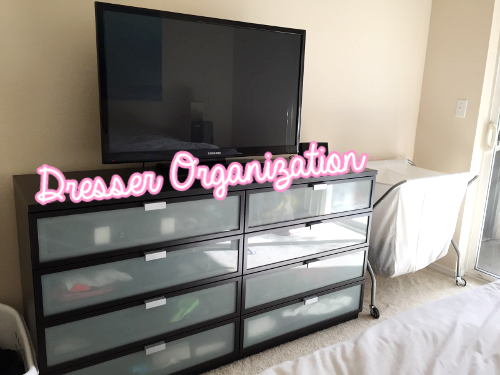 It wouldn’t be spring cleaning without conquering your dressers and closets. There really isn't much need for a big introduction as this is fairly self explanatory sooooo~ this is how I organize my dresser. 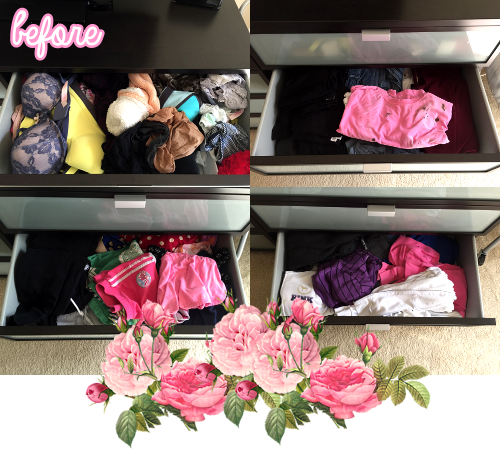 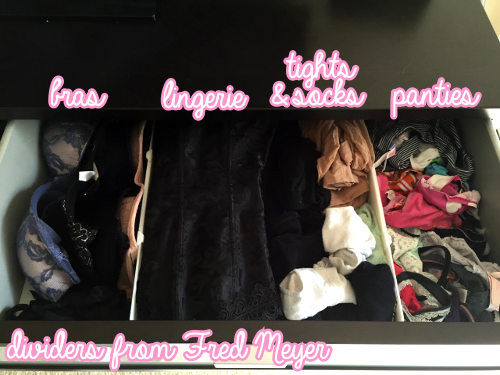 In the top drawer, in order, I have bras, lingerie, miscellaneous items, and underwear. I threw away any bras that were worn and old. The lifespan of a bra is about a year when worn properly (start wearing on the loosest set of hooks first). Each set of hooks is supposed to be worn for approximately 4 months. Since there are 3 sets of hooks, it should be about a year until it is too stretched out and loses elasticity and shape. I throw out bras when they’ve reached that point and just don’t sit correctly on my body. I do the same with lingerie. Although I don’t wear that as often, I still throw out anything that may have lost shape. This can be from the wash, how it was dried, or even how it’s been stored. My miscellaneous items are things like stockings, socks, and tights. Obviously, I threw out anything with runs or pilling. Anything with holes also should be thrown away. That is never attractive. I actually keep two types of underwear: period underwear and nice/everyday underwear. Basically period underwear is old cotton underwear. My everyday stuff is the more expensive silk and lace panties. I just don’t want to risk ruining those. 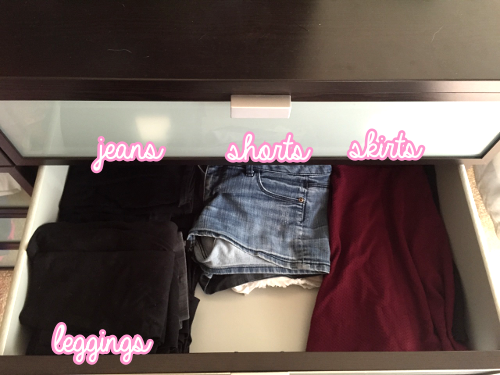 In my second drawer I keep most of my bottoms. This includes jeans, leggings, shorts, and skirts. Obviously shorts are seasonal in Seattle but since I had extra space, I decided to put them in the same drawer as my other bottoms. To prevent my skirts from wrinkling, I try to fold them as little as possible. 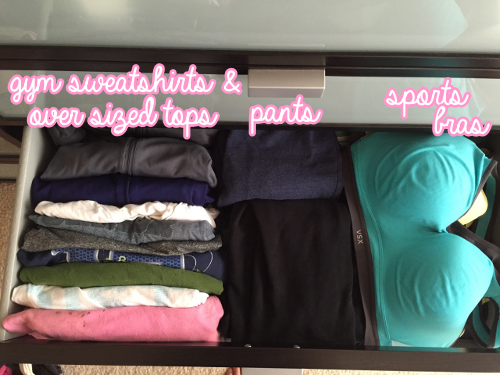 I keep all of my work out-esque attire in my third drawer. On the left, I have my gym shirts and jackets. Then I also have shirts that I dye my hair in. In the middle, I keep my sweatpants and yoga pants together. On the right, I have an extra pair of sweats (I wear these ones around the house), and all my sports bras. If you’re active and go to the gym a good amount, I highly suggest having a drawer or space in your closet just for your fitness clothes. It just makes things so much easier. 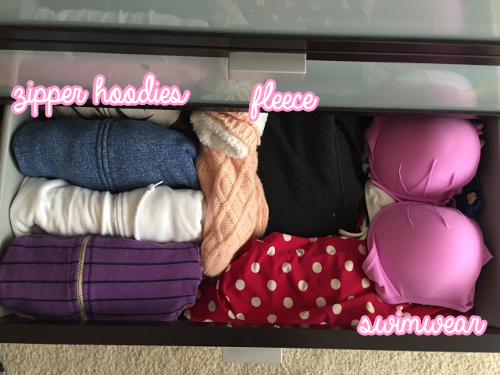 Since we don’t have space to store our seasonal items, this is my seasonal drawer. I had to do some cleaning and donating for everything to fit in here. I now only have 4 sweatshirts and they’re seen on the left. I also have a fleece in the middle and a pair of thick socks for winter activities. With the remaining space, I have my swimsuits. Labels: home, organization  A while back I posted about cutting my hair short. It has grown out a bit but I still bought extensions since I felt naked without long hair. I want to start this post off with the fact that I am not sponsored in any way. This is just my review and thoughts on the Dirty Looks Bobby Glam extensions I ordered. Let’s go~ The trouble with my hair, most extensions do not blend at all. This is because my hair is super thick and slightly coarse (a friend said I have horse hair :[ ). I honestly never understood how extensions would blend into other people’s hair. Whenever I bought the same set that looked good on a friend looked terrible on me. That’s when I started researching. If you’re new to extensions, one thing you need to know is how many grams the extension needs to be in order for it to even blend. Some girls were saying 160g is a lot of hair and would blend well. However, after continued research, old sets I’ve tried were anywhere from 160g to 180g and did not work for me at all. I later found that most Asians need a minimum of 200g for it to start blending. I thought, okay I want something that is somewhat long and at least 200g. That really narrowed down my options.  After literally a week of research, I decided Dirty Looks was the way to go. I mainly saw positive reviews, they had a set of extensions that should blend easily, and shipping looked decent. Enter the Bobby Glam Full Head Hair Extensions Quad Weft. I ordered these bad boys in the color Organic (an off black or soft black color) and in the 220g. For the 220g, the length is 20-22 inches which would bring my hair back to my original length before I cut it. These are made with Remy hair which is the best quality for human hair extensions. And since it’s a “quad weft”, it had four wefts to an extension. Most extensions only have one weft. The nice thing is that there are only 7 pieces that you need to worry about! These are currently on sale starting at $224.14. The regular price is $292.48 so there are some HUGE savings! It didn’t take long for the package to arrive. Seriously, the shipping is insanely fast considering it arrived from the UK. I think it took maybe a week and that’s because I’m in Washington state. I’ve heard some packages coming much sooner when they’re on the East Coast of the USA. The package arrived in a small silver envelope and fit perfectly in our mailbox. There was no need to worry about trying to pick it up from the office.  I opened the package and loved what I saw. Everything was very visually appealing and just plain pretty!
1. A cute postcard with their contact info which I will list at the end of this post.
2. This little booklet has everything you need to know: tips for getting started; how to apply your extensions; how to style and store them; extension care; and their return policy with return form. It’s full of lots of pretty and colorful pictures too so it’s really easy to follow.
3. My extensions which I will go into further detail below.
4. And of course my receipt which is not pictured.
 As you can see, the extensions came in a package with two sections. The first section has the majority of your extensions. The second section is your test weft. OPEN THIS SIDE FIRST! You use it to see if the color of the hair matches. For a better description of my hair, it looks jet black but up close you can see that it’s not. It’s a soft black with red tones. The color organic was a perfect match. If it doesn’t match, then you can send it back. They have a whole section in the booklet that explains how to exchange the product and get the correct color. You can even return the product as long as the safety seal hasn’t been broken.  Now, if your color matches, you can open the safety seal. IF THEY DO NOT MATCH, DO NOT OPEN THIS SEAL! They will not be accepted for returns once this seal is broken. This is for safety and health reasons. I mean really, would you want to receive extensions that someone else opened?  Since my hair matched, I opened the packaging. The hair is tucked neatly into a hair net so the hair will have a slight wave to it once removed. The hair is very soft, shiny, and silky. The color organic has some golden strands and the photo above are the wefts in natural light against an all-black table. The weft measurements are as follows:
1 piece of the 4 Clips, 9 inches (the longest piece that wraps from temple to temple)
2 pieces of the 3 Clips, 5.5 inches (used at the back of your head)
4 pieces of the 2 Clips, 4.5 inches (used on the side of your head)
 Putting the hair in was very easy. The clips stay in place and they don’t slip. If your hair is naturally soft, I would recommend backcombing so they stay in place. They don’t feel heavy and I don’t notice any major shedding. They tangle just like real hair but I’ve noticed it doesn’t tangle nearly as bad as my own hair does. They are still silky, soft, and shiny after 4-5 uses. The biggest question for me was: Will they blend? The answer is yes and no. For the most part they blend. I think if I had a few more wefts they would blend even better since there are some spots where I can tell my hair is short. Keep in mind blending short hair into extensions gets harder the longer the extensions are. Adding that with thick hair seriously just puts the odds of blending against me. However, it can be done! I will post a video or explanation with how I put them in and style them to blend into my own hair at a later date.  Overall, I’m happy with the product. I give them a 5/5 since they do their job. It’s not the extensions fault that they don’t fully blend because my hair is just difficult. I would honestly recommend anyone to check out Dirty Looks because they’re the best extensions I have ever used. I know I will go to them again in the future.
Find dirty looks here: DirtyLooks.comFacebookTwitterYouTubePinterestInstagram
|