|
Welcome

 Simone, 25 Simone, 25 Welcome to my blog! I wanted to do something a little different from posting on Facebook. Instead, I'll post about my life, fashion inspirations, and beauty secrets on my blog. I hope you enjoy your stay and feel free to follow!
 Labels
Beauty Budget Bride Gifts Haul Holiday Home Journal OOTD Organization Personal Planner ReviewInstagram
twitter
likes
Banners
   Disclaimer
Photos without credit are mine.All other photos I post were found from Tumblr. I will always post a click through link to the credit. If the credit is incorrect or if I am using your photo, please let me know ASAP so I can credit it properly. |
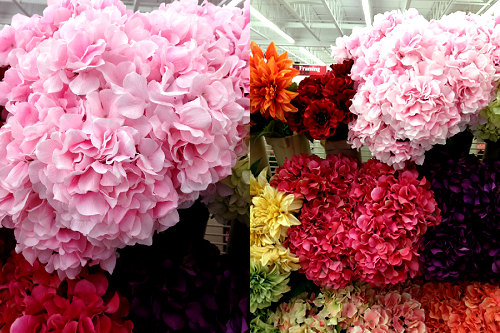 Everyone needs flowers and center pieces for a wedding. I would recommend browsing sites like Tumblr or Pinterest for ideas of what look you like. Reblog/Pin those ideas so you have easy access. I would even recommend saving them to your desktop so you don’t have to be logged into the site to view the things you like. If you're more hands on, go to a store like Michael's or Jo-Ann and play around with the flowers they have. You can put arrangements together to see what is the most appealing to you. It can even give you the option of using fake/silk flowers instead of purchasing real flowers. 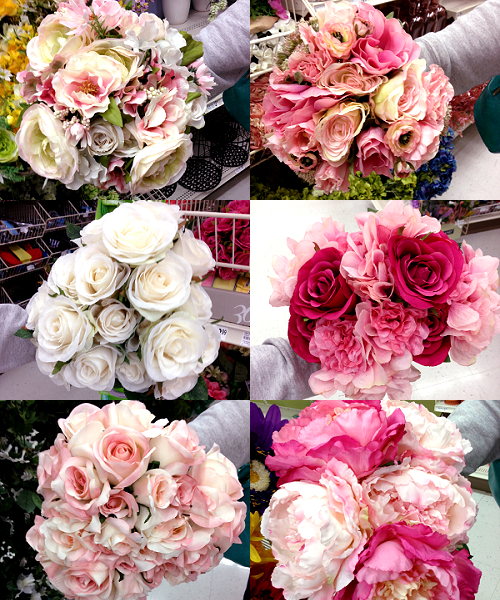 Eventually, I was inspired by white hydrangeas with accents of my wedding color (pink). The next step was to confirm what vases I wanted to use. Always look around, browse, and compare! You don't need to go with the first thing you see. Goodwill, Dollar Tree (the dollar store), and Ikea are all great places to find vases for a low price. I went with Ikea. I was able to buy vases for my tables and I bought two for our entry/guest book area. Vases used for centerpieces only for $1.99. Vases used for entry table for $4.99. If you want to go for a shabby chic look, feel free to mix and match vases! Incorporate different colors, textures, and sizes. Just remember to get vases for your bouquets! If you forget, just use something you have around the house. Luckily, we had large mason jars. Before looking into pricing, I wanted to see if I could even create something I would like. I went to the grocery store, bought 3 hydrangeas (about $5.00 each) and a bouquet of pink carnations ($3.50) and a bouquet of purple daisies (about $5.00). I wasn't too worried about pricing at this time since a bouquet of fresh flowers can typically range from $20-$50. Since hydrangeas are so large, you do not need that many of them to make your centerpieces or bouquets to look nice and full. Carnations are also a great option to make arrangements look full. After playing around, I was able to create something that I liked. I calculated how many flowers I needed per vase and how many per bouquet. 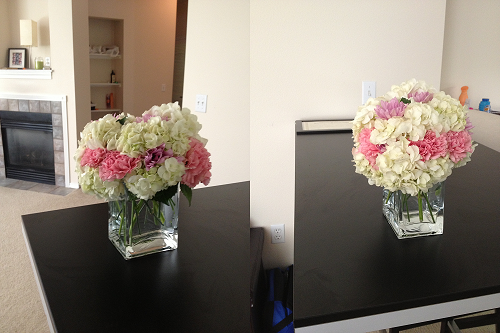 I will have a tutorial on how I created this in part two. Because of the need of flowers for a wedding, florists charge an arm and leg. I found bouquets starting at $75! After browsing the internet, I figured I would just buy flowers from a wholesaler. I went through many reviews to determine my choice and I ended up going with Blooms By The Box. I ordered the flowers a month in advance and made the delivery date for two days before my wedding (wedding was on Friday, flowers arrived on Wednesday). They arrived in a large chilled box. Since hydrangeas need water, each hydrangea steam had water bags on the bottom. Out of the 300+ flowers only 3 of the carnations were wilted. All of the other flowers were beautiful. Keep in mind these flowers will not arrive in full bloom! They literally became more beautiful and fuller each day. By the time it was our wedding day, our flowers looked perfect, fresh, and in full bloom. Once your flowers are delivered, you will have to work fast to put them into fresh water. I did the arrangements all on my own but I would recommend getting some extra hands to help you!! It took a while to take everything out of the box, remove the wrapping, and get them into water. Since I did everything on my own, it took me about 3 hours to complete all 6 centerpieces, 3 bridesmaid bouquets, 1 bridal bouquet, and the 2 arrangements for the table in the entryway. 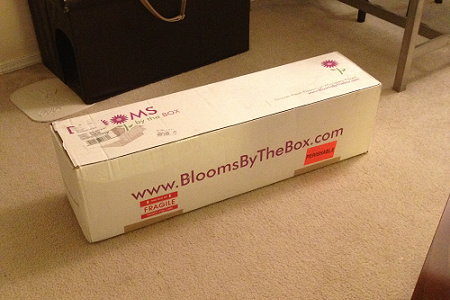 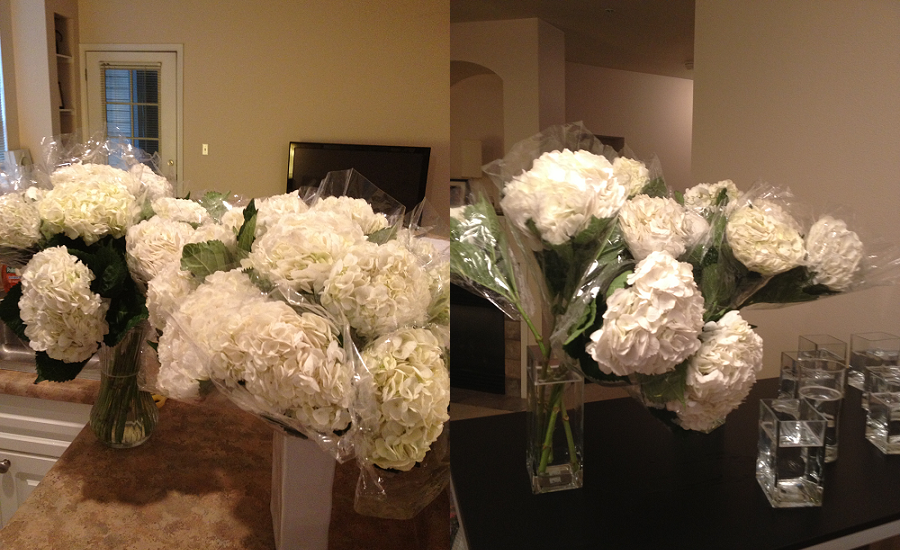 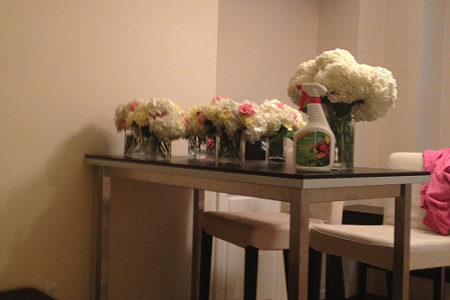 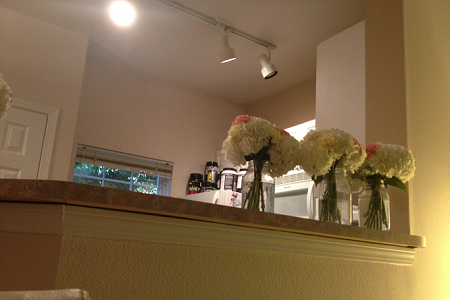 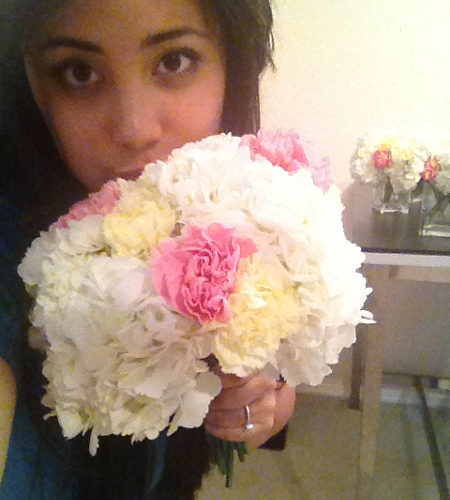 The tricky part was creating the boutonnières and corsages. I practiced months in advance just to test how long they would last. Unfortunately, since I didn't have anything to preserve the flowers with, they wilted fairly quickly. I was fearful of the flowers wilting if I made them earlier so I made them the day of the wedding. Early that morning, I went to the store to buy a dozen roses and long myrtle. Originally I wanted to use the smaller spray roses but they were out of stock. I had to adapt and just used normal sized roses. Again, a dozen roses aren't very expensive, maybe about $15-$20. The myrtle was only a few dollars. If you want to be pampered and not have to worry about little last minute details (I’m talking about bridezillas) then I would recommend making this a job for your bridesmaids. Honestly, I’m glad I had this to do on the day of my wedding. It kept my mind busy! I would have been so restless and more stressed out if I didn't have tasks I could do while I waited to walk down the aisle. Obviously I did this early in the morning but it was very therapeutic. 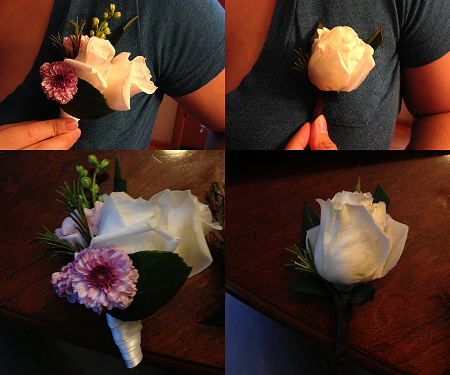 I will have a tutorial on how I created this in part two. In the end, we probably spent more than $350 but less than $400 in flowers, floral supplies, vases, and even the candles that we used for our centerpieces. If you’re worried about what to do with the flowers and vases afterward, use them as thank you gifts to those who helped you out with the wedding! 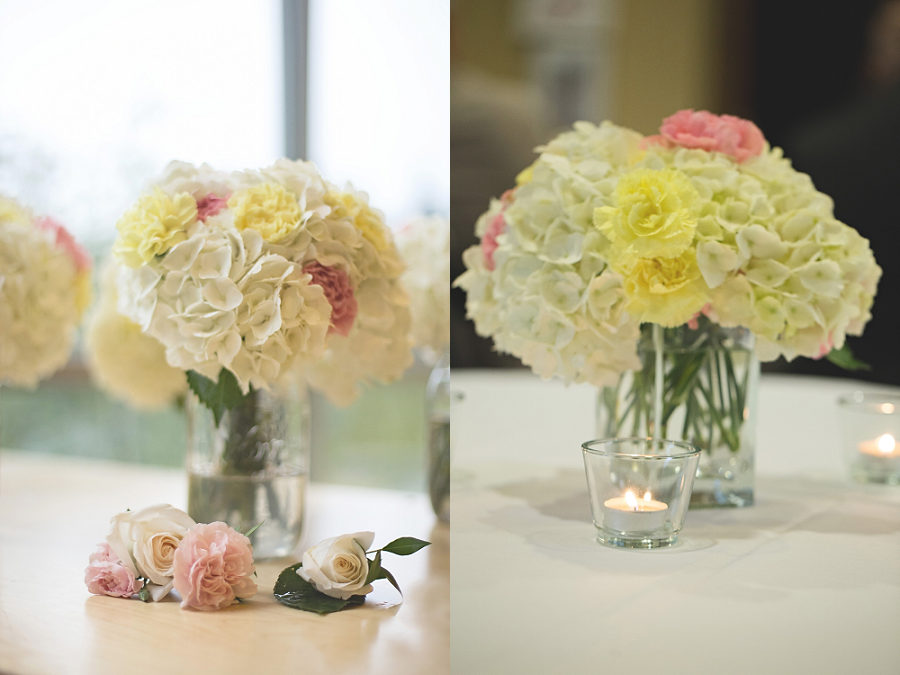 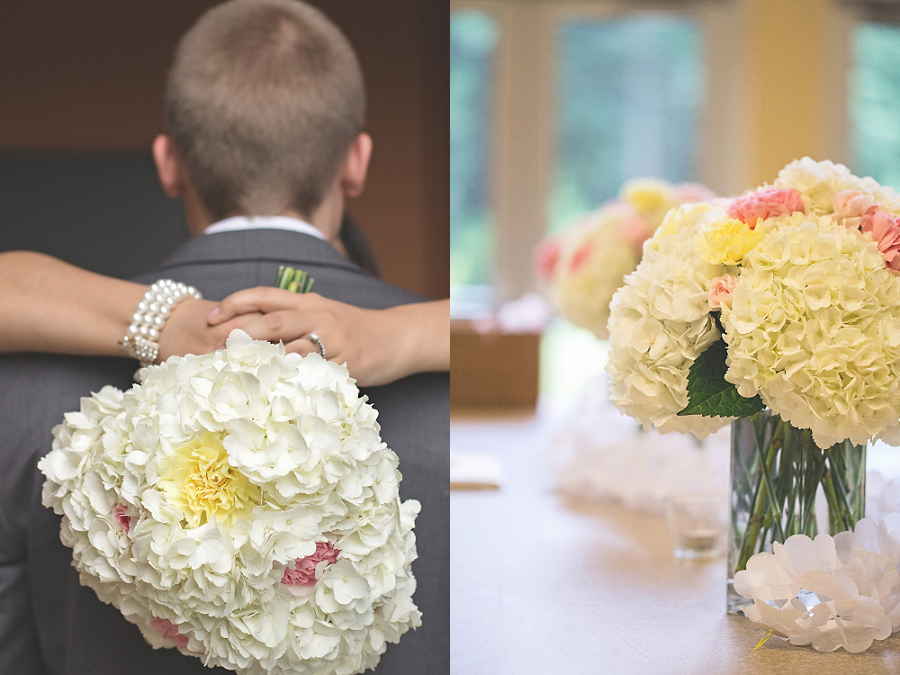 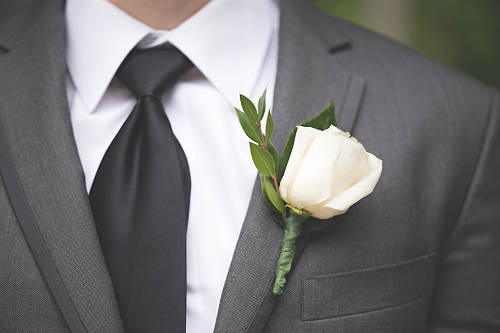 Labels: BudgetBride |